
C# How to make a player controller in Unity 2D
Hello, this writeup shows you how to create a player controller script in C# for a Unity 2D project. There are only four steps! Here is a link to the player controller script in my platforming game. You can play the game here in itch.io.

Step 1
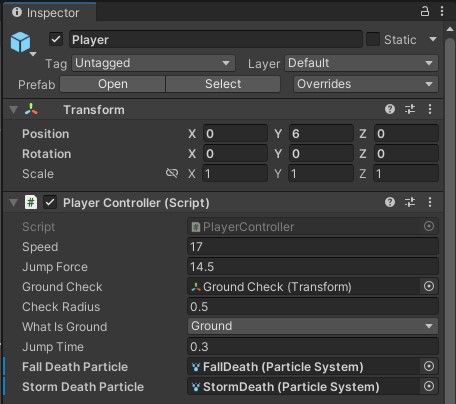
Create a C# script in the Project folder and name it PlayerController. Drag and drop the script onto the player game object in the hierarchy. Then by clicking the game object you can see the script values in the inspector.
First, you will need to create a private Rigidbody2D and a public bool. You want to set the variable isDead to false as the player is alive at the start and assign the rigidbody to the previously created Rigidbody2D variable.
Step 2
Secondly, you need to create a fixed update function to handle move input and the velocity of the player.
Note: We are using fixed update as it runs at a chosen fixed rate, opposed to the update function that runs exactly once per frame.
We also need two more variables called moveInput and speed. The moveInput float returns the value of the axis name. The speed float is exactly what is sounds like, you can have go at altering the speed of the player to your liking.
In the function, assign moveInput to the Horizontal axis and then set the rigidbody velocity equal to a new Vector2. The Vector2 uses two float values, x and y. The x value is calculated by doing moveInput times speed and the y value is just the y velocity of the rigidbody.
Step 3
The update function is the largest one as it handles ground detection, world space rotation, key inputs/jumping, and the players death. I have broken the update function into 4 subheadings for an easier read.
Ground detection
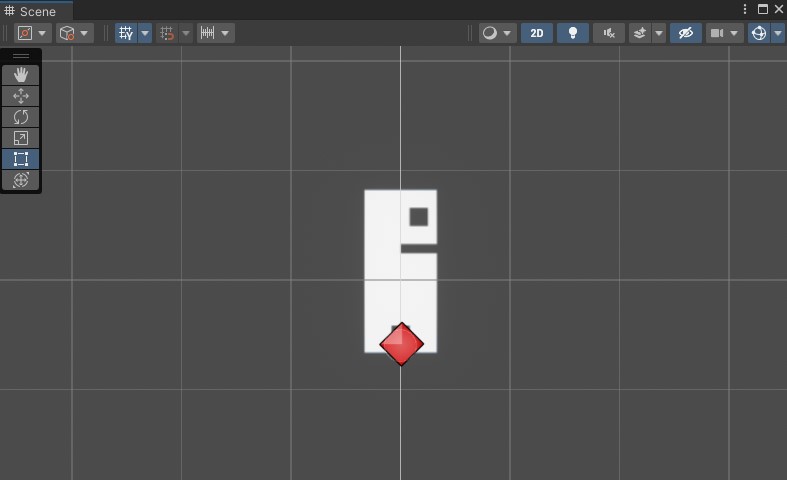
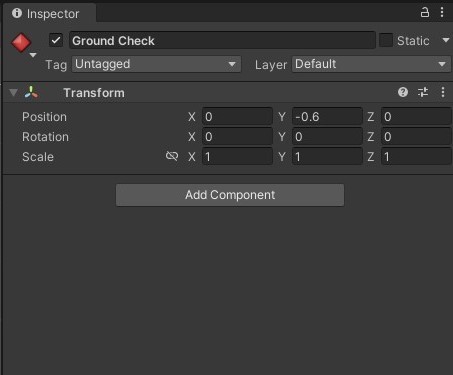
For the first part of the update function, we need to add the ground detection. In the inspector, drag and drop the groundCheck object onto the label field. Place the groundCheck object at the players feet.
Also, create a new layer and call it Ground.
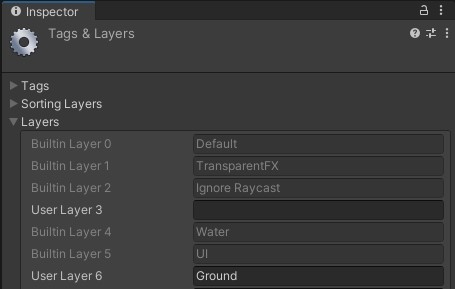
You will need to declare a layer mask and name it whatIsGround. In the inspector, use the drop down field to assign the layer mask a value.

Now, to check if the player is grounded we need to give value to the isGrounded variable. The three variables you just created (groundCheck, checkRadius, whatIsGround) need to be assigned to the isGrounded bool.
World space rotation
We use Transform.eulerAngles and a Vector3 to handle world space rotation. If the players horizontal axis is greater than zero, it means the player is facing to the right. When this occurs, we need to add a Vector3 with the y value of 0. If the axis is less than zero, it means the player is facing left. Now we need to add a Vector3 with the y value of 180.
Note: This is because Vectors in Unity understand 0 as right and 180 as left.

There are no additional variables needed in this section, so add this to the update function:
Key input
There are two main if statements that checks two different ways (GetKeyDown, GetKey) of the player pressing the key W or UpArrow. The first if statement only accepts the input on the first frame they press the key, and the second statement accepts the input for every frame the player is pressing the key.
On the GetKeyDown if statement, if the player is grounded then set the isJumping bool to true. Then set the jumpTimeCounter to equal jumpTime which is the predetermined, initial start time (0.3) of the jump. Lastly, set the velocity of the rigidbody equal to the new direction of the Vector2 (which is up) and times by jumpForce.
The GetKey if statement only has a few differences to the previous one. Instead, we will check if the isJumping is set to true and the jumpTimeCounter is greater than 0. This means the player has started jumping! Make sure to decrement the jumpTimeCounter by Time.deltaTime. This basically means every frame the player is jumping, the jumpTimeCounter will be reduced by the amount of time the frame was being displayed for. Lastly, make an else option that keeps isJumping to false if the player is not jumping.
The GetKeyUp if statement sets isJumping to false. This makes sure that the player will stop jumping if the player release the jump key.
Continuing the update function:
Player death
This section of the update function check if the player object is off the screen. If the player is below the screen the player object is destroyed and the particle effect is played from where the player died. To do this, you will need to a drag and drop the particle effect onto the player script in the inspector.
Continuing the update function:
Step 4
Lastly, there should be a game over, or maybe the player looses some health if the player collides with the enemies. In this example, the player dies on collision with the enemy (binary storm) which is found by the object tag. This collision detection is done in a separate function called OnCollisionEnter2D. Then set the isDead bool to true (this bool can be used to indicate the players death in other scripts so game over UI can be activated).
Thanks!
Thank you for reading and hopefully you have a working player controller for a platform game. Here is the complete script:
 Twitter